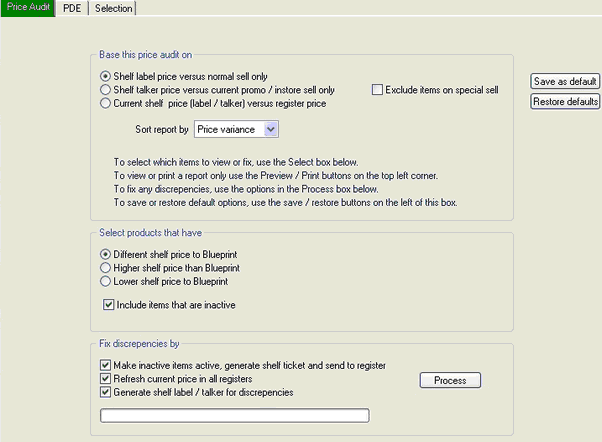
The Price Audit report function in Ezi Office allows you to compare prices on shelf to those in the system and fix any discrepancies that are found.
Before beginning any report click on the Clear All button, on the bottom right hand side of the screen, this will return all tabs to the default settings.
When all setting are back to default the 3 buttons on the bottom right hand side will be green.
BASE THIS PRICE AUDIT ON: This section allows you to tell Ezi Office what data you are giving it to analyse.
Exclude Items On Special Sell: Ticking this box will stop the price audit from analysing products which are scanning at a promotional sell price.
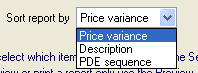
Sort Report By: Using the drop down arrow you can choose from one of the below pictured ways of sorting the report data.
SELECT PRODUCTS THAT HAVE:
Include Items That Are Inactive: Ticking this box will allow you to identify products which are not currently scanning in your analysis.
FIX DISCREPANCIES BY:
Set up the filters (if required) as per the Filtering Options instructions.
Click on the PDE button on the right hand side.![]()
This will bring up the PDE tab, as pictured below.
Ensure the list is empty, if products are still in the list click on the Clear Reads button.
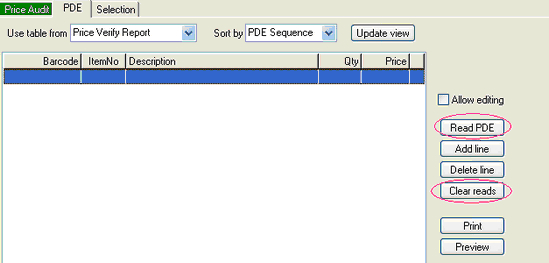
When ready to download data from the PDE click on the Read PDE button, as circled above.
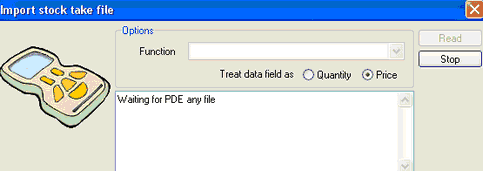
When the above appears Ezi Office is ready to accept the download.
Set up your PDE in the cradle as per the instructions.
When the download is complete the screen pictured below will be visible.
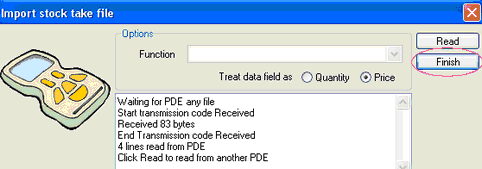
Click on the Finish button.
To return to the main screen click on the green Price Audit tab.
To view a report of the issues Ezi Office has found click on the Preview button on the top right of the screen.

After viewing the preview if you would like to print the report click on the Print icon located at the top of the screen, as circled above.
If you would like to close the preview screen and return to Ezi Office click on the Close button, as circled above.
Once all settings are programmed click on the Process button on the front screen.
When the POS update screen appears click on Send
After the updates have been sent to the registers a label printing screen will appear, print as per the Labels instructions.