Now that you've created your stocktake using Ezi Stocktake, please follow the steps below to work with your RF stocktake data entries in Ezi Office.
1 |
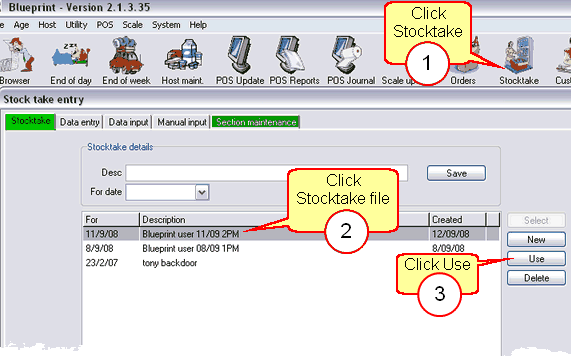
Click the Stocktake icon from the top toolbar.
|
2 |
Click the correct stocktake entry
|
3 |
Click the Use button |
4 |
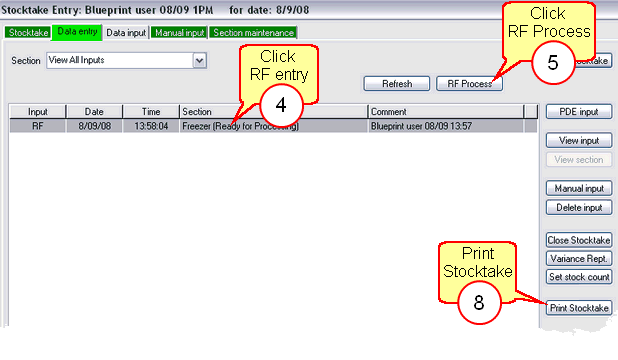
Click the correct RF entry in the Data entry tab screen.
|
5 |
Click the RF Process button |
6 |
Please wait - do not press Enter on the keyboard or click Cancel.
Your RF PDE entry will automatically produce a report and display on screen. You may wish to print or save this log for reference should you have any queries. When you have finished with the log report, close the document.
|
7 |
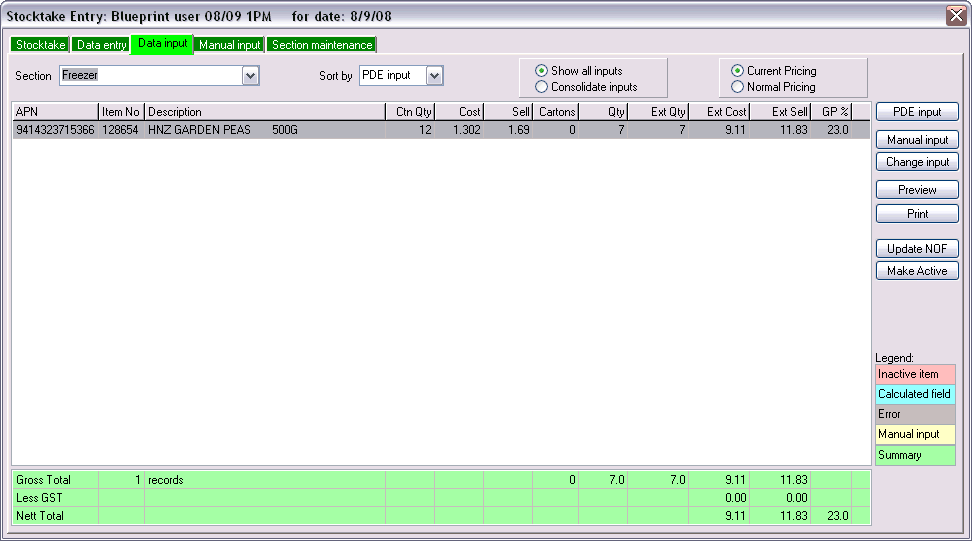
Your RF PDE entry will also display in Ezi Office's Data input tab where you can do further work. See Manual Entries & Adjustments.
|
8 |
To print your valuation report, click the Data entry tab screen then click Print stocktake |
For more information on the Ezi Office stocktake screen, see Stocktake.