|
Ezi Stocktake works identical to Ezi Office's Stocktake set up. What's different here is - as you begin your stocktake using Ezi Stocktake, you are also sending the same information to Ezi Office as you go along from set up to finishing your data entry.
You save time by eliminating the need to set a new stocktake file in Ezi Office as well as doing away with downloading from your unit/PDE.
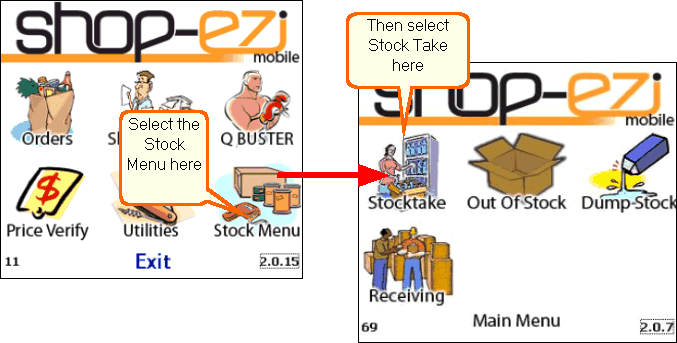
To access the Stocktake screen, tap the Stock Menu button from Ezi Mobile's main menu.then select Stock take
|
|
|
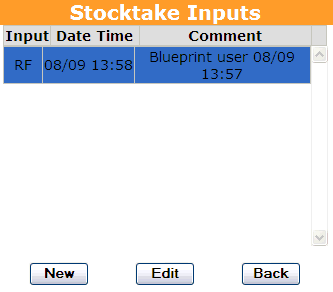
New button
New Stocktake button creates a new stocktake file.
Stocktake list
The stocktake list displays new and old stocktakes - identical to Ezi Office. Items highlighted in blue indicates you have selected this stock take.
Edit button
Change an existing stocktake file. Tap the file you wish to change - this will be highlighted in blue. Then tap the Edit button.
|
|
|
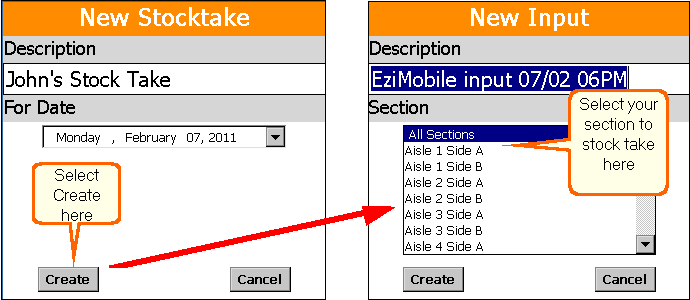
Create New Stock Take
If you wish to start a new stock take then select the new option the screen next appears, you can give your stock take a name and select the date of the stock take then hit Create the next screen will appear and allow you to select a section you want to stock take or you can select all sections then hit create again on this screen to start
Section
Attach a section to this PDE stocktake. This will help to keep track of what areas of your store has or hasn't been counted. The areas manually written down as counted should match the PDE stocktake entries in Ezi Office.
Stock Take Description
You can leave the stocktake description as it is or simply start typing in a new description using the keypad on your PDE unit.
This description will be displayed on the stocktake list and on printed reports. Please use appropriate descriptions so you can easily identify each stocktake file.
Section Description
Use the comment box if you have more than 1 person stocktaking. Type the stock taker's name to replace the words "Ezi Office user". This will help in any data entry and counting queries and allow the person stock taking to take ownership of this very important task. |
|
|
Start Input Once you have setup or selected your stock take please start to scan all your items required, once a item is scanned it will appear with its description and other details described below. please note a input is required for stock take it will not default to a qty of 1 like in other moduals, this is requied as some items you stock take will require a qty of 0 (zero ) this is important that you count items that have a qty of zero as this will effect the stock on hand in the back office.. |

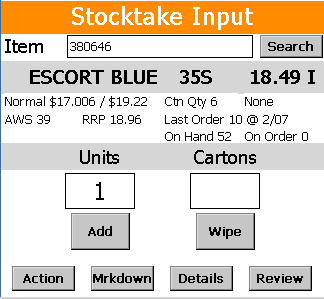
Wipe button
The Wipe button clears the displayed item on the screen. Use the Wipe button when you don't want to order what you scanned or keyed in.
Action Button
Allows you to make Action request to the item currently displayed on screen. See Ezi Action.
Details button
Displays further information on the item displayed on screen. See Ezi Details.
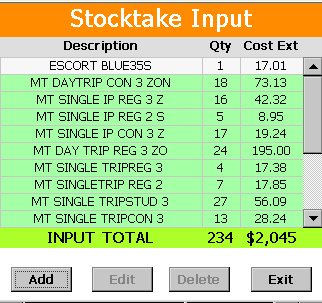
Review button
The stocktake input review screen displays items you have counted, a running total of units counted and total cost (based on current cost). Due to the size of the screen, only the last 9 items are able to be displayed. Use the scroll bar on the left of the screen to view the rest of your order - scroll up or down. To access the review screen, tap the Review button from the Stocktake Input screen.
|
Add button
The Add button will take you to the Input screen to add more items to your stocktake.
Edit button
The Edit button allows you to make changes to your selected item (highlighted in blue). It will take you to the Input screen to make changes to your unit or carton count.
Delete button
The Delete button removes the selected item (highlighted in blue) from your items list. The deleted item will not be included in your final stocktake report. |
|
|
Exit button
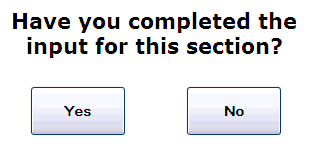
Use the Exit button when you have finished adding items to your stocktake. After selecting the Exit button, you will be asked if you have finished counting for this stocktake file.
Answer Yes - to finalise this stocktake file Answer No - to leave the stock take and return later to complete |
|
|
Stocktake Inputs
The Stocktake Inputs screen is different to the Stocktake Input screen. This last screen displays a list of all your PDE entries. |