Filtering tab
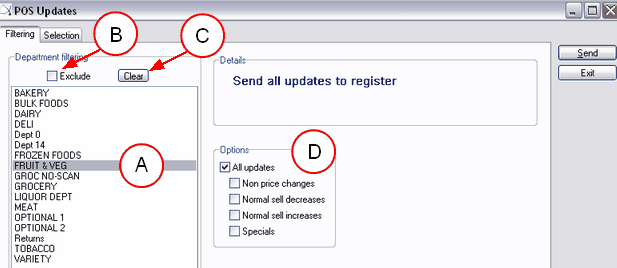
Department filtering
You can elect to send one or more departments to send to POS. Clicking on a department name will highlight your selection to send to POS (A). Only highlighted departments will be sent to the registers.
To send all departments except the highlighted departments, click in the box next to Exclude to place a tick (B).
To remove a selection, click on the department name again (A).
To remove all selections, click the Clear button (C).
Options
You can elect to send all or only specific changes to POS. The default selection is to send All updates.
In the Options section, click in the box next to a specific price change to place a tick (D). Only marked price changes will be sent to the registers. You can mark up to three (3) different price changes to send to POS.
Click in the box next to All updates to send all changes to POS.
Selection tab
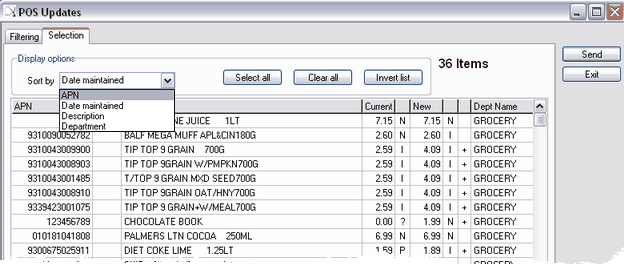
Display options - Sort by
Click the drop-down button to display the available sort options. You can sort the list by the following:
APN - Will display your list by barcode, by numerical order
Date maintained - Will display your list by when each item was last updated, by date order
Description - Will display your list by alphabetical order which makes it easier to locate items
Department - Will group the list by departments then by alphabetical order
Display options - Buttons
Select all - Selects all items in the list to send to POS
Clear all - De-selects any highlighted items
Invert list - Selects the opposite from highlighted items or vice versa.
Send - Send to POS now
Exit - Exit this screen
Display options - List
Shows a list of all items waiting to be sent to POS. It is advisable that you check your selection tab before sending changes to check you know exactly which products will be sent to the point of sale.
You can select to send one specific item or a number of selected items to send to POS. Do this by clicking in the Send column next to the item which will then be highlighted in green. All other items without a tick in the Send column will not be sent to POS at this time. When you have made your selections, click the SEND button on the right.