Ezi Office allows you to print labels for a whole Department, Sub-department or any Group in Item Properties, without having to generate the products individually.
To print labels using this function...
1 |
Click on the Shelf tickets button under the Home tab of the toolbar. |
2 |
Click on the Clear All button before beginning to set your filters. |
3 |
Using the drop down arrow in the Label Selection section, select From Selection/PDE.
|
4 |
Using the tabs along the top of the screen which are circled above (Supplier, Department, Groups, Location/Brand) you can select which Group you wish to print labels for |
5 |
For example if you would like to print all the labels for products from Test Supplier first click on the Supplier tab. |
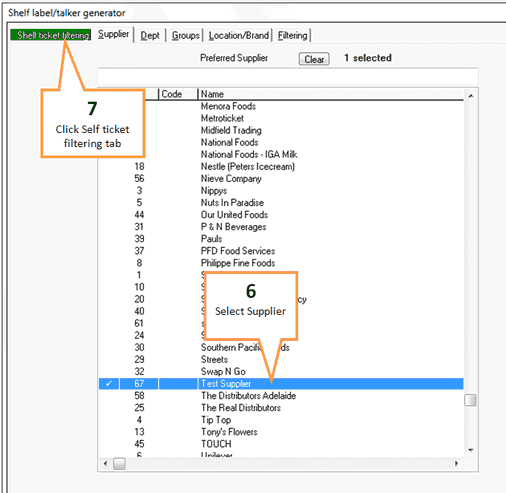
6 |
Click to highlight Test Supplier from the supplier list.
|
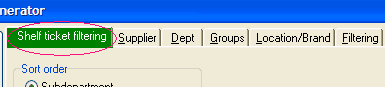
7 |
Click on the green Shelf Ticket Filtering tab to return to the main screen. |
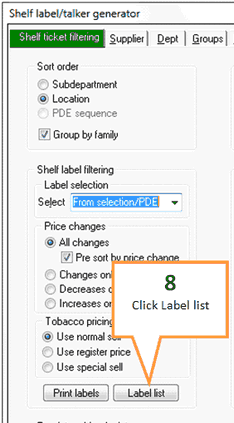
8 |
Click on Label List button to view the products Ezi Office will print labels for.
|
9 |
Once you have verified these are the products you want labels for click on the green Shelf Ticket Filtering tab to return to the main screen.
|
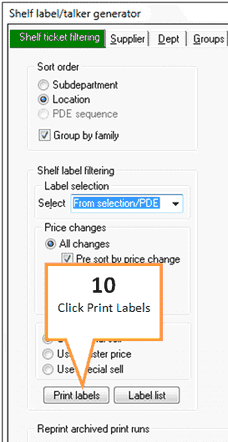
10 |
Click on the Print Labels button, the Shelf Label Printing screen will appear.
|
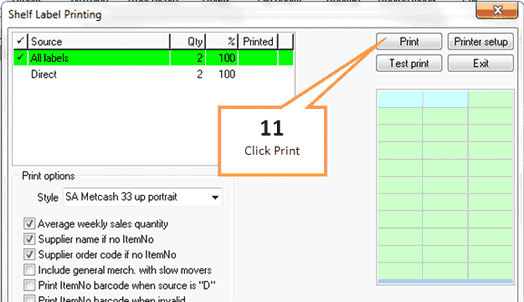
11 |
When you have put the stationary in the printer click on the Print button. Ezi Office will ask you if all the labels have been printed correctly, remember to wait until all labels have been printed before selecting YES/NO as you can use the re-print facility.
|